
table of contents
Site Analysis and Surveying: The Ground Truth That Every Successful Build Is Built On
What You’ll Find in This Article…
Before a single permit is submitted, before a single design is drawn, before a single dollar of construction budget is committed, there is a question that every serious builder asks about every site: What are we actually building on? That question – and the systematic, professional process of answering it – is what site analysis and surveying is. It is not a formality. It is not a box to check on the way to the real work. It is the investigative discipline that reveals what a piece of land can support, what it will cost to build on it, and what risks lie beneath the surface waiting to surface at the worst possible moment.
The financial case for accurate surveys is simple: finding a problem before construction is inexpensive. Finding it after concrete is poured is not. That sentence distills a truth that every experienced builder has learned, usually by watching a project suffer through the consequences of skipping or compressing the site investigation that would have caught the problem on paper rather than in concrete. This article exists so that truth does not have to be learned the hard way on your project.
Inside, you will find a complete briefing on what site analysis and surveying actually involve for residential, remodel, and commercial construction projects in Utah’s Wasatch Front – with current methodologies, technology, and cost benchmarks. Specifically:
- The precise distinction between the different types of surveys- boundary, topographic, ALTA/NSPS, geotechnical, environmental, and as-built — and why each one is required for specific project types
- Why the Wasatch Front’s geology is one of the most consequential and least understood site analysis variables in all of Utah construction – including the Wasatch Fault, Lake Bonneville soils, liquefaction zones, and the seismic design implications that affect every foundation decision in Salt Lake, Utah, and Davis Counties
- The 2026 surveying technology revolution – drone LiDAR, photogrammetry, scan-to-BIM, RTK GPS, and real-time 3D modeling – what each delivers, what it costs, and when each is the right tool
- The utility mapping imperative: why calling 811 is the beginning of due diligence, not the end of it, and what professional private utility locating reveals that the public system misses
- FEMA flood zone analysis, elevation certificates, and what every Utah homeowner and developer needs to understand about their property’s flood risk before design begins
- The full site analysis sequence that RainFire Builders conducts before any project breaks ground – and how each investigation connects to downstream budget, design, and schedule decisions
What Site Analysis and Surveying Actually Are — and Why They Are Not the Same Thing
The terms “site analysis” and “site surveying” are frequently used interchangeably, but they describe related and overlapping disciplines with distinct purposes. Understanding the distinction helps you know what you need, why you need it, and what happens when either is skipped.
Site surveying is the science of precise measurement and documentation. It answers questions with numbers: Where exactly are the property lines? What is the elevation at every point on the lot? How does water drain across the site? Where are the utilities buried? A licensed land surveyor uses instruments, legal records, physical monuments, and professional judgment to produce legally defensible documentation of a site’s physical characteristics.
Site analysis is the interpretive process that transforms survey data into decisions. It takes the numbers from the survey and asks: What do these numbers mean for what we want to build? Can this soil support the structure? Is this drainage pattern going to route water toward the building? Does this elevation put any part of the site in a FEMA flood zone? Does the proximity to the Wasatch Fault require seismic design upgrades? Site analysis is where the raw data becomes actionable intelligence – and where the professional judgment of experienced engineers, geologists, and builders translates physical facts into design and budget implications.
A construction site survey is a process used to gather information on the condition, topography, and environmental factors of a specific area prior to beginning a construction project. The components of a typical survey include planning, analysis, boundary definition, and infrastructure review that converge into a detailed legal document. Risk management, precise building placement, and feasibility study support are among the many benefits that make site surveying an essential part of the construction process.
Together, site surveying and site analysis form the investigative foundation of every project that finishes where it was supposed to finish, costs what it was supposed to cost, and performs the way it was designed to perform. They are the instruments that separate confident project decisions from optimistic assumptions – and in Utah’s Wasatch Front market, where the geology is complex, the seismic risk is real, and the consequences of foundation problems are severe, this investigative foundation is not optional.
The Survey Toolkit: Every Type of Survey and When You Need It
Not every project requires every type of survey. Understanding which surveys apply to your specific project, site, and jurisdiction is one of the first things a knowledgeable builder helps you determine. Here is the complete taxonomy.
Boundary Survey: The Legal Foundation of Every Project
A boundary survey defines legal property lines. Applications include property sales, legal disputes, and compliance with zoning laws. Tools include theodolites, measuring tape, and GPS.
A boundary survey is the legal determination of where your property begins and ends. It identifies the physical corners of your parcel, documents any encroachments by or onto neighboring properties, identifies easements and rights-of-way that affect the usable area, and produces a legal plat that the building department will require to verify that your proposed structure meets setback requirements from property lines.
For any new construction project, a current boundary survey is not optional – it is a permit prerequisite. For remodel projects on established properties, a boundary survey may already exist in the county records, but if the most recent survey is more than ten years old or if you are adding any structure that approaches a setback line, a new survey should be commissioned. Encroachment issues that were harmless when discovered on paper become expensive when discovered after a footing is poured in the wrong location.
In Utah, boundary surveys must be performed by a licensed Professional Land Surveyor (PLS). The survey must be recorded with the county recorder’s office to be legally binding. The time required ranges from two to five days for a standard residential lot to two to three weeks for a complex parcel with multiple easements, record discrepancies, or physical marker issues.
RainFire Builders’ Pro Tip: When reviewing a boundary survey, ask the surveyor specifically about any discrepancies between the legal description in your deed and the physical monuments on the ground. Gaps between what the deed says and what the survey finds are not uncommon – and they need to be resolved before any construction document places a building on the site, because the building department will use the survey, not the deed, to verify setback compliance.
Topographic Survey: Understanding What the Land Does
A topographic survey maps the three-dimensional surface of the site – the grade changes, the drainage patterns, the relationship between the building pad and adjacent grades, the location of trees, utilities, improvements, and natural features. It is the document that enables your grading plan, your drainage design, your erosion control plan, your cut-and-fill calculations, and your architectural understanding of how the home will relate to the land.
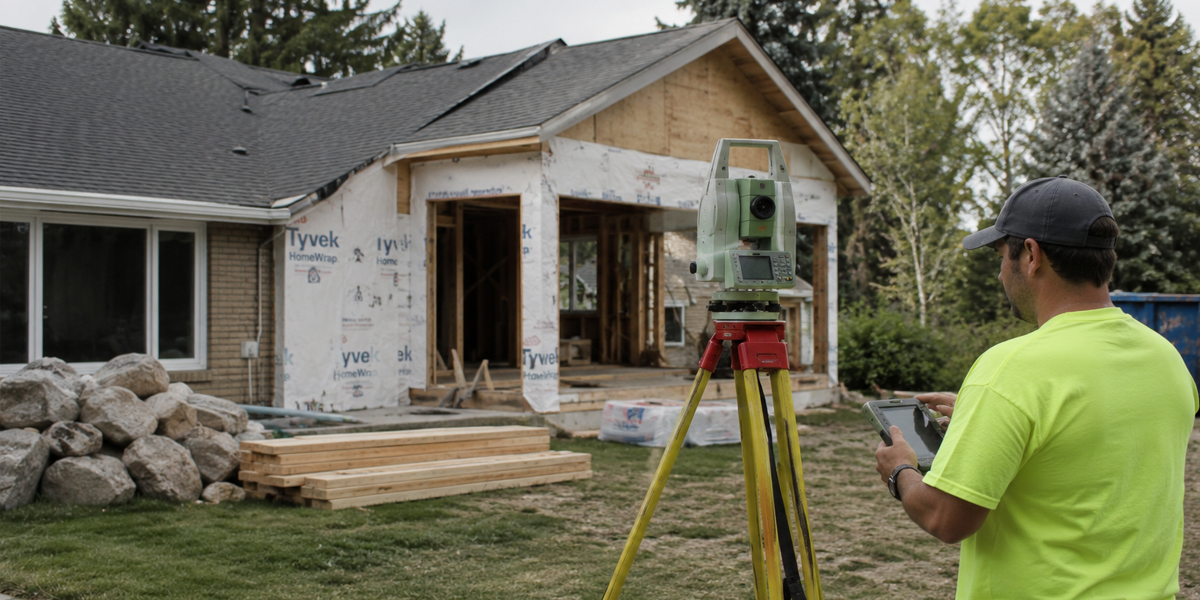
Topographic surveys measure land elevations and contours. Applications include road construction, landscaping, and site grading. Tools used include total stations, GPS devices, and drones.
Without a topographic survey, a builder is designing a home on a lot they do not fully understand in three dimensions. A grade change that looked minor during a site visit may require retaining walls, engineered fill, or significant grading that was never in the original site work budget. A drainage pattern that was not identified may route stormwater toward the building, toward a neighbor’s property, or toward a public right-of-way in ways that trigger municipal review, redesign, and delay.
Topographic surveys are typically delivered as contour maps – drawings showing lines of equal elevation at defined intervals – along with a digital terrain model that can be imported directly into design software and BIM platforms. In 2026, drone-generated topographic surveys using photogrammetry or LiDAR have become the dominant method for residential and light commercial projects, producing more detailed data at lower cost than traditional ground-based methods. More on this technology shift in Section 5.
2026 Cost Benchmark: Drone LiDAR detailed surveys cost approximately $400 to $500 per acre for engineering-grade topographic data. Standard drone photogrammetry runs $150 to $300 per acre. For a typical residential lot of less than one acre, a comprehensive drone topographic survey with ground control points typically runs $1,500 to $4,000, depending on site complexity and deliverable requirements.
ALTA/NSPS Land Title Survey: The Gold Standard for Commercial Transactions
The ALTA/NSPS Land Title Survey – produced to standards jointly developed by the American Land Title Association and the National Society of Professional Surveyors – is the comprehensive survey standard required for commercial real estate transactions and title insurance.
ALTA surveys provide comprehensive property information for commercial real estate transactions. These surveys play essential roles in construction projects, ensuring accurate boundaries, evaluating land suitability, guiding construction placement, and facilitating property transactions.
An ALTA survey goes substantially beyond a standard boundary survey. It identifies and locates all easements of record, rights-of-way, encroachments, physical improvements on and adjacent to the property, parking areas, utility connections, signage, and fencing. It incorporates FEMA flood zone information. It documents the relationship between the surveyed property and adjacent public rights-of-way. And it is prepared to a standardized national accuracy specification that makes it universally accepted by title insurers, lenders, and the legal system.
For any commercial construction project involving financing, any commercial property acquisition, and any project where title insurance is required, the ALTA survey is the appropriate instrument. It is more expensive than a standard boundary survey — typically $3,500 to $12,000 for a commercial parcel depending on size and complexity – but the comprehensive scope justifies the investment on any transaction where multiple parties are relying on the accuracy of the property documentation.
Construction Staking: Translating Design to Ground
Construction staking is the surveying discipline that translates the architect’s drawings into physical markers on the ground that construction crews use to position every element of the project – building corners, foundation edges, grade stakes for excavation, utility line locations, and road or driveway alignments.
Construction staking is crucial for all projects. A contractor will only know where to place site improvements if a surveyor lays out survey markers for buildings, driveways, grading, utilities, and other site improvements. Working hand-in-hand with contractors, surveyors who go the extra mile will find the errors others may miss.
This is the survey that saves the project from the devastating and entirely preventable error of building in the wrong location. A footing poured four feet closer to the property line than the permit specifies is not a minor error – it is a code violation that may require demolition and reconstruction. A foundation laid at the wrong elevation may create drainage problems, clearance problems, or structural issues that compound through every subsequent phase of construction.
Construction staking is performed in phases: first, when the building footprint is laid out for excavation, then when the foundation forms are positioned, and then as grade stakes are set throughout construction to verify elevations. Each phase depends on a licensed surveyor verifying that what is being built matches what was designed and permitted.
As-Built Survey: The Project’s Permanent Record
As-built surveys document what was actually constructed rather than what was designed. They verify that a foundation is where the plans said it should be, that a utility line was installed at the correct depth, and that a retaining wall was built to spec.
The as-built survey is conducted at project completion and produces a permanent record of what was actually built, where it was actually built, and at what elevation every element was constructed. For new construction, the as-built survey is frequently required by the building department as a condition of certificate of occupancy issuance. For utility installations, the as-built record is the document that future excavation crews will depend on to know where not to dig.
As-built surveys are also an invaluable resource when a property owner returns to do additional work years later – a renovation, an addition, a utility upgrade – and needs accurate documentation of what exists in the ground and in the structure before planning what to add.
Utah Wasatch Front Geology: The Site Analysis Variables That Make Every Other Market Look Simple
Building anywhere on the Wasatch Front of Utah is a geologically consequential act. The mountains, the valley, the soil beneath the cities, and the fault system that created all of it are not academic background – they are active, measurable factors that directly determine how every building in this region must be designed, founded, and constructed.
Understanding these factors is not optional knowledge for someone building or remodeling in Salt Lake, Utah, or Davis County. It is the knowledge that protects your investment.
The Wasatch Fault: The Most Important Geological Feature in Utah Construction
The Wasatch Fault Zone runs approximately 250 miles from southern Idaho to central Utah, directly along the eastern edge of the Salt Lake Valley, passing through or near every major Wasatch Front community – Ogden, Layton, Salt Lake City, Murray, Sandy, Draper, and Lehi. It is one of the most seismically active fault systems in the United States and the single most significant geological risk factor for Wasatch Front construction.
The urban areas of the Wasatch Front are built upon soft lake sediment. Of particular concern, given the geology of the area, are amplified ground shaking and liquefaction. A magnitude 7 earthquake on the Salt Lake City segment of the Wasatch Fault could cause “one of the most severe instances of ground shaking ever experienced by a metropolitan area” in the United States.
The seismic design implications for construction are direct and significant. Structures built on the Wasatch Front are designed to a seismic design category that reflects both the proximity to the fault and the soil conditions at the specific site. Buildings on firm rock close to the mountains may qualify for a lower seismic design category than buildings on soft valley sediments closer to the fault trace or in areas with known liquefaction susceptibility. The site-specific seismic classification is determined by the combination of the Utah Geological Survey’s hazard maps, the site’s distance from the fault, and the results of a geotechnical investigation that characterizes the soil conditions.
Critical Utah Gem: The Wasatch Fault has a designated fault rupture hazard zone established by the Utah Geological Survey. Within this zone – which runs along the base of the Wasatch Range – new construction of occupied structures is prohibited or heavily restricted under Utah law. If you are purchasing land on or near the mountain front, confirming the property’s relationship to the fault rupture hazard zone boundary is a due diligence step that cannot be delegated to a general visual assessment. A licensed geologist or geotechnical engineer familiar with UGS mapping can confirm this definitively from current state GIS data.
Lake Bonneville Soils: The Geological Legacy That Makes Utah Foundations Different
The Salt Lake Valley, Utah Valley, and most of the lower-elevation terrain of the Wasatch Front are underlain by the sediments of ancient Lake Bonneville – the massive inland sea that covered much of Utah approximately 12,000 to 30,000 years ago. As the lake receded, it deposited layers of fine-grained silts, clays, and sands across the valley floor. These sediments are the foundation condition beneath virtually every urban neighborhood on the Wasatch Front.
The Holocene to Upper Pleistocene alluvial, lacustrine, and deltaic deposits that fill Utah Valley are generally moderately to very highly susceptible to liquefaction according to geological classification systems.
The Lake Bonneville deposits create two distinct challenges for construction:
Expansive clay behavior. The fine-grained lacustrine clays that characterize much of the valley floor are classified as expansive soils – they shrink during dry conditions and expand when wetted. A clay soil with a plasticity index above 20 exerts significant lateral and uplift forces on concrete foundations as moisture conditions change seasonally. Slab-on-grade foundations in highly expansive soil conditions can experience cracking, heaving, and differential movement that damages the structural integrity of the slab and the finish systems above it. A geotechnical investigation that characterizes the plasticity index of your specific site’s soil is the instrument that determines whether your foundation design is adequate or dangerously optimistic.
Liquefaction susceptibility. In a seismic event of magnitude 5.0 or greater, water-saturated sandy soils can momentarily behave as a liquid – losing their bearing capacity and allowing structures above them to sink, tilt, or suffer sudden differential settlement. The Salt Lake Valley has extensive mapped areas of moderate to high liquefaction susceptibility, particularly in the lower-elevation central valley where water tables are shallower and the sediments include saturated sand lenses within the otherwise clay-dominant stratigraphy.
Liquefaction can occur in an earthquake of magnitude 5 or greater where water-saturated sandy soils exist. When shaken, the ground liquefies and acts as a fluid. This may significantly damage buildings by causing them to sink or tilt.
The geotechnical investigation for any project in a mapped moderate-to-high liquefaction zone should specifically address liquefaction potential through standard penetration testing (SPT) or cone penetrometer testing (CPT) at depths sufficient to characterize all potentially liquefiable layers beneath the proposed foundation. The results directly inform the foundation system selection – which may range from a conventional spread footing (appropriate for sites with low liquefaction potential and adequate bearing capacity) to a post-tension slab, deep piers, driven piles, or ground improvement techniques for sites with significant seismic vulnerability.
Wasatch Front Insider Gem: The Utah Geological Survey publishes publicly accessible liquefaction susceptibility maps for Salt Lake County, Davis County, Utah County, and other Wasatch Front jurisdictions. These maps are available through the UGS website and can be used for preliminary screening before commissioning a geotechnical investigation. However – and this is critical – the published maps are based on generalized geological units and are not a substitute for site-specific boring data. A site that sits in a “moderate” liquefaction susceptibility zone on the published map may have site-specific conditions that are significantly better or worse than the zone average. The geotechnical investigation is the only instrument that resolves this uncertainty.
Slope Instability: The Third Geotechnical Variable
Beyond seismic hazards and expansive soils, properties at the base of the Wasatch Mountains – and those on canyon alluvial fans that spread into developed neighborhoods – carry slope instability and debris flow risks that can be severe and sudden.
Several Sandy, Draper, and Cottonwood Heights neighborhoods are located on or adjacent to debris flow fans from Wasatch Mountain canyons. Following periods of heavy precipitation or rapid snowmelt, these fans can experience debris flow events that carry significant destructive potential. The site-specific risk for any property on or near a mountain front alluvial fan should be evaluated by a licensed engineering geologist who is familiar with Utah’s documented debris flow history and the specific canyon system affecting the site.
Geotechnical Investigation: The Investigation Beneath Every Other Investigation
Every other site analysis decision flows from the geotechnical investigation. The foundation type, the grading design, the drainage system, the seismic design category, the structural system — all of these are determined, directly or indirectly, by what the geotechnical report reveals about what is in the ground.
A comprehensive geotechnical report is arguably the most critical piece of pre-construction due diligence. It is a detailed assessment of ground conditions, including soil type, density, bearing capacity, groundwater levels, and potential for settlement. Think of it as a doctor’s diagnosis for your building site.
A complete residential geotechnical investigation for a Wasatch Front project typically includes:
Subsurface exploration. A drilling crew advances borings at strategic locations across the building footprint – typically at building corners and at least one interior location – to depths sufficient to characterize the soil profile through the zone of foundation influence. For a standard two-story residential structure on a conventional foundation, borings typically extend to 15 to 25 feet below existing grade. For deeper foundation systems, larger buildings, or sites with known problematic conditions, deeper borings are required.
Standard Penetration Testing (SPT). As each boring is advanced, the driller performs SPT measurements at regular intervals – driving a standard sampler into the soil with a standard energy input and counting the blows required to advance the sampler a measured distance. The SPT “N-value” is a measure of soil density and strength that correlates to bearing capacity, liquefaction susceptibility, and suitability for different foundation types.
Laboratory testing. Soil samples retrieved during drilling are tested in a geotechnical laboratory for Atterberg limits (plasticity index – the key metric for expansive clay behavior), grain size distribution, moisture content, and other parameters that characterize the soil’s engineering properties.
Groundwater measurement. The depth to groundwater is measured during drilling and monitored in the days after drilling – because the water table elevation directly affects liquefaction susceptibility, foundation waterproofing requirements, and the feasibility of basement construction.
Engineering analysis and report. The licensed geotechnical engineer analyzes all field and laboratory data and produces a written report that includes: a description of the subsurface conditions encountered, a characterization of the soil’s engineering properties, a specific foundation recommendation (type, depth, bearing pressure, and reinforcement requirements), seismic site classification (Site Class per IBC/ASCE 7 standards, which determines the seismic design requirements for the structure), and recommendations for site grading, drainage, and earthwork.
A $5,000 geotechnical report can save $200,000 in foundation redesigns. You need to know bearing capacity, water table depth, contamination risk, and whether the site needs special foundations. Don’t skip this step on any project with significant earthwork.
2026 Cost Benchmark: Residential geotechnical investigations in the Wasatch Front market typically cost $2,500 to $6,500 for standard lots with straightforward conditions. Sites with suspected problematic conditions – mapped high liquefaction susceptibility, slopes greater than 15%, proximity to the fault rupture hazard zone, or suspected fill soils – typically require additional borings and testing that may push the investigation cost to $8,000 to $15,000. This cost is recovered many times over in the budget protection it provides.
The Surveying Technology Revolution: Drones, LiDAR, and the Data Density Shift
The most significant transformation in construction site analysis in the past decade is not a change in what needs to be known about a site – it is a change in how quickly, how accurately, and how cost-effectively that knowledge can be gathered. The drone surveying and LiDAR revolution has fundamentally altered the capability-to-cost ratio for topographic data collection, and in 2026, the technology has matured to the point where it is not an exotic option – it is the preferred method for most site survey applications.
Drone Photogrammetry: The High-Resolution Site Portrait
Drone photogrammetry uses a UAV equipped with a high-resolution camera and a GPS positioning system to capture hundreds of overlapping aerial images of a site in a single flight. Specialized software processes those images – using the positional data from each photo and the overlap between adjacent images – to produce a photorealistic three-dimensional model of the site surface, along with an orthomosaic (a geometrically corrected aerial photograph accurate to centimeter-level precision), a digital surface model (DSM), and a digital terrain model (DTM).
Standard drone photogrammetry achieves 3 to 5 cm horizontal and 1 to 3 cm vertical accuracy with ground control points or RTK correction. This meets ASPRS standards for most mapping and construction applications.
The practical benefit for construction site analysis is transformative: instead of a topographic survey with hundreds of manually measured points over a day’s field work, a drone survey delivers a site model composed of millions of data points collected in a single flight of less than an hour. The resulting model shows every grade change, every drainage feature, every tree, every existing structure, and every surface feature with a level of detail that traditional ground surveying cannot economically approach.
Drone surveys typically cost 50-75% less than traditional ground surveys for sites over 5 acres. A 20-acre site that costs $15,000 to $30,000 to survey traditionally can be drone-mapped for $3,000 to $6,000.
Drone LiDAR: When Photogrammetry Hits Its Limits
LiDAR – Light Detection and Ranging – uses laser pulses rather than cameras to measure the distance to every surface the laser strikes. A drone-mounted LiDAR scanner emits tens of thousands of laser pulses per second as it flies the site, producing a dense three-dimensional point cloud of the terrain.
LiDAR is best for projects requiring terrain penetration, high elevation accuracy, and vegetation analysis. It performs well in forests, corridor mapping, mining, and infrastructure surveys. Drone LiDAR can achieve centimeter-level accuracy, making it ideal for topographic surveys, grading analysis, and terrain modeling in engineering and construction.
The critical advantage of LiDAR over photogrammetry is its ability to penetrate the vegetation canopy. Because LiDAR uses laser pulses that can pass through gaps in foliage, it captures the actual ground surface beneath trees and dense vegetation – producing an accurate bare-earth terrain model even in heavily vegetated sites where photogrammetry would capture only the top of the canopy. For sites with significant tree cover, this is not a minor technical distinction — it determines whether the topographic data you receive is accurate for engineering purposes or not.
LiDAR hardware is significantly more expensive than camera-based systems. Drone LiDAR surveys typically cost $400 to $500 per acre for engineering-grade deliverables, compared to $150 to $300 per acre for photogrammetry. For most residential lots under one acre, the total cost difference is modest; the choice between the two should be driven by site characteristics (specifically, vegetation density) rather than cost alone.
Scan-to-BIM: The Revolution for Existing Building Analysis
For renovation and remodel projects, the equivalent of drone surveying on an open site is 3D laser scanning – and the workflow that delivers the most value from that scanning is scan-to-BIM.
Scan-to-BIM does not merely consist of “fancy equipment plus a model.” A point cloud represents measured geometry, while a BIM model is interpreted geometry that includes semantics, families, and tolerances. A prefabricated manifold that had to be scrapped and re-welded in the field could have been identified in Navisworks during the design phase had a pre-construction reality capture survey been executed, saving over $40,000 in wasted materials, labor, and emergency permits. In high-stakes construction, “Trust me, it’s accurate” is not a valid Quality Assurance policy.
In practical terms, a 3D laser scanner captures millions of measurement points from every surface in a building interior in a matter of minutes per scan position. When scans from multiple positions are combined and registered, the result is a complete, millimeter-accurate three-dimensional point cloud of the entire existing building. That point cloud is then processed by a BIM modeler who builds a three-dimensional parametric model of the building’s structural system, MEP systems, walls, floors, and ceilings from the measured data.
The renovation contractor who designs against this model is designing against measured reality – not against assumptions, not against as-built drawings that may not reflect decades of modifications, and not against field measurements taken by hand during a brief site visit. The result is that structural conflicts, mechanical interference, and dimensional surprises that typically surface during renovation demolition are instead identified and resolved in the design model – where they cost nothing to fix – rather than in the field, where they cost everything.
In 2026, the cost per square foot for scan-to-BIM typically ranges from $0.50 to $2.10 for standard commercial spaces at Level of Detail 200/300 and $2.00 to $10.00 or more for dense mechanical rooms and healthcare facilities. For a 2,500-square-foot residential renovation, the total cost of a professional 3D scan and basic BIM model typically runs $1,500 to $4,500 – an investment that consistently returns multiple times its cost in avoided field rework on complex renovation projects.
2026 Technology Gem: The most important thing to know about drone surveying for construction in 2026 is the distinction between mapping-grade and survey-grade accuracy. Now, establishing legal property boundaries will always require a licensed land surveyor with boots on the ground. That’s not going to change. But for almost every other phase of design and construction, drone surveys deliver genuinely survey-grade data. The real game-changer is the data density. Instead of getting a few hundred survey points over a week, you get a complete 3D model of your entire site – made up of millions of points – in just a few hours. Drone photogrammetry and LiDAR surveys can provide the topographic data, cut-and-fill calculations, drainage modeling, and three-dimensional design context that construction projects require. They cannot, without a licensed PLS signing and sealing the deliverable, substitute for a legally binding boundary survey. Know which type of survey your project needs, and engage the right instrument for each
Environmental Site Assessment: The Investigation Behind the Investigation
Every site carries a history. For sites in established urban and suburban areas – which describes much of the Wasatch Front’s available infill and redevelopment inventory – that history may include prior uses that have left contamination, regulatory restrictions, or environmental conditions that directly affect what can be built, how it can be built, and what it will cost to build it.
The Phase I Environmental Site Assessment (ESA) is the first-tier environmental screening conducted before every commercial property acquisition and increasingly before residential development on sites with any prior commercial or industrial use history.
A Phase I ESA does not involve sampling or analysis of soil or groundwater. It is a desktop and field review – a review of historical records, regulatory agency databases, aerial photograph archives, and a site reconnaissance walk – conducted by a qualified environmental professional. The goal is to identify “Recognized Environmental Conditions” (RECs): any evidence of past releases of petroleum products, solvents, metals, or other hazardous substances to the soil or groundwater that could represent a liability to the buyer or a constraint on the proposed development.
If a Phase I ESA identifies recognized environmental conditions, a Phase II ESA is triggered. This involves actual sampling and analysis of soil and groundwater. Budget 8 to 12 weeks and $15,000 to $50,000 for Phase II work.
For residential development on previously undeveloped or low-density residential sites with no commercial history, a Phase I ESA is typically not required. But any site with any prior commercial use – a former gas station, a former dry cleaner, a former agricultural site with pesticide history, a former industrial property – should be screened with a Phase I before purchase commitments are made. The cost of discovering soil contamination after closing is never less than the cost of the Phase I that would have identified it before.
For renovation projects in buildings constructed before 1985, the environmental assessment extends to include asbestos-containing material (ACM) surveys and lead-based paint assessments. Given the EPA regulatory changes that took effect in May 2026, these assessments are not merely good practice – they are legally required before renovation work that disturbs suspect materials, and the enforcement posture around compliance has tightened considerably. Any Utah builder executing renovation work on pre-1985 commercial buildings without a completed asbestos survey is operating with serious regulatory exposure.
Utility Mapping and the 811 Reality Gap
Calling 811 – the national “Call Before You Dig” service – is a legal requirement before any excavation in Utah. It is also the beginning of utility due diligence, not the end of it.
The 811 service notifies public utility companies of planned excavation, and those utilities send locators to mark their facilities – gas, electric, water, sewer, telecommunications – with color-coded paint or flags. This service is free, and using it before any excavation is both legally required and fundamentally important.
But there is a gap between what 811 covers and what actually exists in the ground.
Contact utility companies as early as possible – some utility companies need 90 or more days for new connections. Map out water, sewer, gas, electric, and telecom locations early.
The 811 system has several known limitations. It covers only utilities operated by companies that have registered with the system – which excludes many private utilities, older abandoned lines that were never decommissioned, and utilities installed by previous property owners that are not part of any public utility system. It provides approximate locations, not engineering-grade precision – the marked location of a buried utility may be several feet from the actual facility. And it provides no information about depth, condition, or the existence of utilities that have been cut off and abandoned in place without documentation.
For any excavation project that involves deep cuts, foundation work, or work in an area with complex utility history, professional private utility locating using Ground Penetrating Radar (GPR) and electromagnetic induction provides a substantially more complete picture of what is in the ground than 811 marks alone.
GPR sends radar pulses into the ground and records the reflections from subsurface features – including buried utilities, abandoned foundations, voids, and subsurface structures that have no record in any publicly available database. The result is a subsurface map that reduces the risk of striking an unmarked utility during excavation from a serious possibility to a remote one.
Essential Gem: When commissioning private utility locating for a complex project, ask specifically for both electromagnetic locating (which detects metallic utilities by inducing a signal in the line) and GPR (which detects non-metallic utilities – PVC pipe, concrete conduit, clay tile sewer – that are invisible to electromagnetic methods). Using only one method consistently misses the other category. A comprehensive private utility locate uses both, cross-references the results, and produces a single map that shows all detected features with their estimated depth and alignment.
FEMA Flood Zone Analysis and the Elevation Certificate
For any project in or near a FEMA-mapped Special Flood Hazard Area (SFHA), flood zone analysis is a pre-design necessity that affects the building’s floor elevation, its foundation system, its insurance requirements, and in some cases, the feasibility of the project itself.
FEMA’s Flood Insurance Rate Maps (FIRMs) classify land into flood zones based on modeled flood risk. The classifications most relevant to Utah construction:
Zone X: Minimal to moderate flood risk. No flood insurance required by lenders as a condition of financing (though it remains available and advisable in many Zone X properties). Most Wasatch Front valley floor construction is in Zone X.
Zone A and Zone AE: High flood risk. A Base Flood Elevation (BFE) is established for Zone AE areas – the modeled elevation of the 1% annual chance (100-year) flood. New construction in Zone AE must have its lowest floor elevated at or above the BFE, with many local jurisdictions requiring additional freeboard of 1 to 2 feet above the BFE. Flood insurance is required by federally backed lenders for properties in Zone A and AE.
FEMA and the floodplain administrator work with local engineers and surveyors to collect the data to inform the maps. Flood hazard areas are determined using statistical analyses of records of river flow, storm tides, and rainfall, floodplain topographic surveys, and hydrological and hydraulic analysis.
The Elevation Certificate is a FEMA-standardized document prepared by a licensed surveyor that documents the elevations of the key components of a structure relative to the BFE for the site. Lenders require it to set flood insurance premiums accurately. Building departments require it as a condition of a certificate of occupancy for new construction in mapped flood zones. And insurance companies use it to determine whether the structure’s risk profile is consistent with the FEMA zone classification – in some cases, a correctly documented elevation certificate can demonstrate that a structure is actually above the BFE and qualify for substantially reduced insurance premiums even within a mapped flood zone.
For any project on a site that may be in or near a mapped SFHA, confirming the flood zone status and the relationship between the proposed construction elevation and the BFE is a pre-design requirement – not a permit submission afterthought.
The RainFire Site Analysis Sequence: How We Investigate Before We Build
At RainFire Builders, site analysis and surveying are not a pre-construction checklist item that gets checked off and filed away. It is an active investigation process whose results inform every design decision, every structural engineering decision, and every budget line from the first estimate through the construction contract.
Here is our sequence for every project:
Step 1: Existing records review. Before any field investigation begins, we review every available document about the site: county assessor records, existing survey plats, title report easements, county GIS data including the Utah Geological Survey’s hazard maps for the site’s specific location, FEMA FIRM panel covering the site, utility atlas records, aerial photograph history, and any prior geotechnical or environmental reports that may exist from previous development activity on the site. This desktop review costs nothing and frequently reveals conditions that change what subsequent field investigations are required – making the subsequent work more targeted and more efficient.
Step 2: Boundary and topographic survey. We engage a licensed Professional Land Surveyor for every project to produce a current boundary survey and topographic map of the site. For projects under two acres where vegetation is not a significant factor, we typically use drone photogrammetry with ground control points for the topographic component, producing a more detailed site model at lower cost than ground-based total station surveying. The resulting documentation is the base for all architectural and site design work.
Step 3: Geotechnical investigation. We engage a licensed geotechnical engineer with specific Wasatch Front experience for every new construction project and for renovation projects where the existing foundation conditions are uncertain or the proposed modifications may affect structural loads. Our geotechnical specifications require boring at all building corners and at least one interior location, SPT testing at regular intervals, laboratory testing of samples for plasticity index and grain size distribution, groundwater observation, and a written report with specific foundation recommendations, seismic site classification per ASCE 7, and geotechnical parameters for structural design.
Step 4: Environmental assessment. For all projects involving pre-1985 buildings, all projects on sites with prior commercial or industrial use history, and all commercial projects, we commission the appropriate environmental assessment – Phase I ESA for initial screening, expanded to Phase II if warranted by the Phase I findings, and ACM/lead survey for applicable renovation projects.
Step 5: Utility mapping. We initiate 811 locating for all excavation projects. For projects in areas with complex utility history, significant excavation depth, or prior commercial or industrial use on the site, we supplement 811 marking with professional private utility locating using both electromagnetic and GPR methods.
Step 6: FEMA flood zone verification. We confirm the FEMA flood zone status of every site, and for any project near a mapped SFHA, we confirm the relationship between proposed construction elevations and the BFE with the building department and the surveyor before finalizing the floor elevation in the design documents.
Step 7: Site analysis synthesis. All of the above findings are synthesized into a pre-construction site analysis briefing that we review with every client before design work is finalized. Every finding that affects the budget is quantified. Every finding that affects the design is incorporated into the design brief. And every risk that warrants monitoring during construction is documented in the project risk register with a specific mitigation strategy.
This is the investigative foundation that gives every RainFire project the ground truth it needs to succeed.
The Ground Truth Your Project Needs Starts Here. So Does the Right Builder.
Site analysis and surveying are not exciting. There are no dramatic reveals, no showroom moments, no finishes to admire. It is the professional discipline of knowing what you are building on before you build on it – and it is the foundation, literally and figuratively, on which every successful project stands.
RainFire Builders brings to every Wasatch Front project the site analysis discipline, the Utah geological knowledge, the licensed professional relationships, and the builder’s eye for translating investigation findings into design and budget decisions that your project deserves. We have guided clients through challenging soil conditions, seismic design requirements, environmental discoveries, flood zone complexities, and utility surprises – and in every case, the difference between a manageable situation and a catastrophic one was finding it before concrete was poured.
The first step is a free site consultation. Bring your lot, your existing building, your design ambitions, and every question you have not been able to get a clear answer to. We will give you our honest read on what your site requires, what investigations we recommend, and what the findings will mean for your project’s design, budget, and timeline – before you commit to anything.
Schedule Your Free Site Consultation → rainfirebuilders.com/contact-us
(385) 336-7246 · Sandy, Utah · Serving the Entire Wasatch Front
✓ Utah geological knowledge applied to every project · ✓ Licensed, bonded & insured · ✓ We respond within 1 business day
These three things serve fundamentally different purposes and are usually all needed on a new construction project, though the sequence and scope depend on what you are building and where. A boundary survey establishes the legal edges of your property – where your land begins and ends, where easements run, and what setbacks apply. It is a legal document prepared and signed by a licensed Professional Land Surveyor. Every new construction project requires one, and in Utah, it must be on file with the county recorder for the building department to verify setback compliance. A topographic survey maps the three-dimensional surface of your site – the grade changes, drainage patterns, existing trees and improvements, and the elevation data your architect needs to design the building’s relationship to the land. In 2026, this is typically done with drone photogrammetry or LiDAR for most residential and light commercial projects, producing a far more detailed dataset at lower cost than traditional ground-based methods. Site analysis is the interpretive layer built on top of the survey data – it takes the measurements from the boundary and topographic surveys, combines them with the findings from the geotechnical investigation, the environmental assessment, the utility mapping, and the FEMA flood zone review, and translates all of that into implications for your design and budget. For a new construction project, you need all three. For a renovation project on an existing improved lot where the boundary is well-documented, you may primarily need a topographic survey of the existing conditions and a site analysis that focuses on the building’s existing structural and mechanical conditions. Your builder or design team can help you determine the specific investigations your project requires based on the site, the project type, and the local jurisdiction’s requirements.
The Wasatch Fault’s influence on construction in the Salt Lake Valley extends far beyond the properties in the immediate mountain front area where the fault itself is mapped at the surface. The influence operates through two primary mechanisms. First, the entire valley floor is underlain by Lake Bonneville sediments whose behavior in a seismic event is fundamentally different from bedrock – soft sediments amplify ground shaking, meaning that a major earthquake on the Wasatch Fault produces more intense shaking at a property on the soft valley floor than it would at the same distance on bedrock. This amplification is why the seismic site classification of your specific site – which determines the seismic design requirements for your structure – depends on the soil conditions at your location, not just the distance from the fault. Second, the valley floor’s Lake Bonneville soils include areas of significant liquefaction susceptibility, where water-saturated sandy layers may lose their bearing capacity during a seismic event. The Utah Geological Survey publishes liquefaction susceptibility maps for the entire Wasatch Front, and many of the most liquefaction-susceptible areas are in the middle of the valley – far from the mountains but directly in the path of the fault’s amplified shaking effects. The practical implication: a geotechnical investigation that includes seismic site classification and liquefaction potential assessment is not just for properties near the fault. It is standard practice for any significant structure anywhere on the Wasatch Front valley floor, and the findings directly determine your foundation design requirements.
Drone surveying technology in 2026 has reached a level of accuracy and reliability that makes it the preferred method for topographic data collection on most construction projects. Standard drone photogrammetry with RTK GPS correction or ground control points achieves 3 to 5 centimeter horizontal accuracy and 1 to 3 centimeter vertical accuracy – meeting ASPRS (American Society for Photogrammetry and Remote Sensing) standards for Class 1 topographic mapping, which is appropriate for virtually all site design and engineering applications. Drone LiDAR achieves centimeter-level accuracy even in vegetated conditions where photogrammetry’s performance degrades. The data density advantage is equally significant: where traditional ground surveying might produce a few hundred precisely measured points across a residential lot over a full day’s work, a drone survey produces a three-dimensional model of millions of points in a single flight of less than an hour. What drone surveying cannot replace is a legally binding boundary survey. Establishing and documenting legal property lines requires a licensed Professional Land Surveyor with boots on the ground, physical monument research, legal records review, and a signed and sealed survey document. This requirement is not going to change – it is a function of the legal system, not the technology’s capabilities. The practical division in 2026 is clear: use drone surveying for topographic data, site modeling, cut-and-fill analysis, drainage modeling, and construction progress documentation. Use a licensed PLS for boundary determinations, construction staking, and as-built surveys that will become legal records.
First: do not panic, and do not assume the project is dead. Most unexpected site conditions, when discovered early enough in the planning process, have engineering solutions – solutions that have a cost and a schedule impact but that do not make the project infeasible. The severity of the situation depends on what was found and how early it was found. Environmental contamination discovered before design is finalized can be addressed through remediation planning, adjusted building footprint placement to avoid the most contaminated areas, or engineered barriers – all of which are manageable with proper professional guidance. Problematic soil conditions identified in the geotechnical investigation almost always have foundation engineering solutions: post-tension slabs for expansive clay, deep piers or driven piles for sites with poor bearing capacity or liquefaction risk, ground improvement techniques for sites where conventional foundation options are inadequate. FEMA flood zone issues can sometimes be resolved through an administrative process called a Letter of Map Amendment (LOMA) if the survey data demonstrates that the property is actually above the Base Flood Elevation despite being in a mapped flood zone – or through design adjustments that elevate the structure above the BFE at manageable cost. The worst outcomes consistently occur when unexpected conditions are discovered during construction rather than during pre-construction investigation – because at that point, the options are constrained, the costs are compounded by disruption to ongoing work, and the emotional and financial investment the owner has already made makes objective decision-making harder. The correct response to any unexpected site finding, whenever it is found, is to engage the appropriate specialist immediately – a licensed geotechnical engineer for soil issues, a qualified environmental professional for contamination, a licensed surveyor for flood zone questions – get a written assessment of the options and their cost implications, present those options to your builder and design team for integration into the project plan, and make a decision based on complete information rather than anxious reaction.
The answer has two parts: what is the realistic timeline, and what is the right sequence? On timing: a boundary and topographic survey for a standard residential lot can typically be completed in two to four weeks from the engagement of the surveyor. A geotechnical investigation – including the field-work, laboratory testing, and report production – typically takes three to five weeks for a standard residential project in the Wasatch Front market. A Phase I Environmental Site Assessment, when required, takes two to four weeks. A private utility locate can typically be completed within one to two weeks of engagement. Depending on which investigations are required and whether they can be conducted simultaneously (most can), a complete site analysis package for a typical residential new construction project takes approximately four to six weeks from engagement of the investigation team to receipt of all reports. On sequence: site analysis and surveying should happen before design is finalized, not after. The geotechnical findings in particular must inform the structural engineer’s foundation design, the architect’s slab or crawlspace decision, and the mechanical engineer’s system design if HVAC equipment is proposed below grade. The topographic survey must be in the architect’s hands before the grading plan, drainage design, and floor elevation are established. FEMA flood zone confirmation must precede the decision on first-floor elevation. In the RainFire project delivery model, site analysis and surveying begin immediately after the initial project consultation and design brief – running concurrently with early design schematic work so that by the time the first design documents are ready for client review, the site analysis package is complete and every design decision can be made with full knowledge of the site’s conditions and constraints. This parallel approach eliminates the delay that occurs when investigations happen sequentially with design, and it eliminates the design rework that occurs when a geotechnical finding arrives after the structural system has already been designed to a different assumption.
author info:
About the Author: Alan Seegrist